Communication is critical to any successful project. Lucky for you, TeamGantt makes it easy to keep everyone in the loop as your project progresses!
To start collaborating with others, simply invite them to your project. Each person invited to your project will count as a user in your account, regardless of their account- and project-level permission.
Watch this video to learn more about inviting people to your projects.
Invite users to your project
As a manager, you have 3 ways to invite new users to your projects:
- Method 1: Open the project you want to invite people to, and click Menu > Manage People and Labels.

- Method 2: Click the People tab at the top of your project.

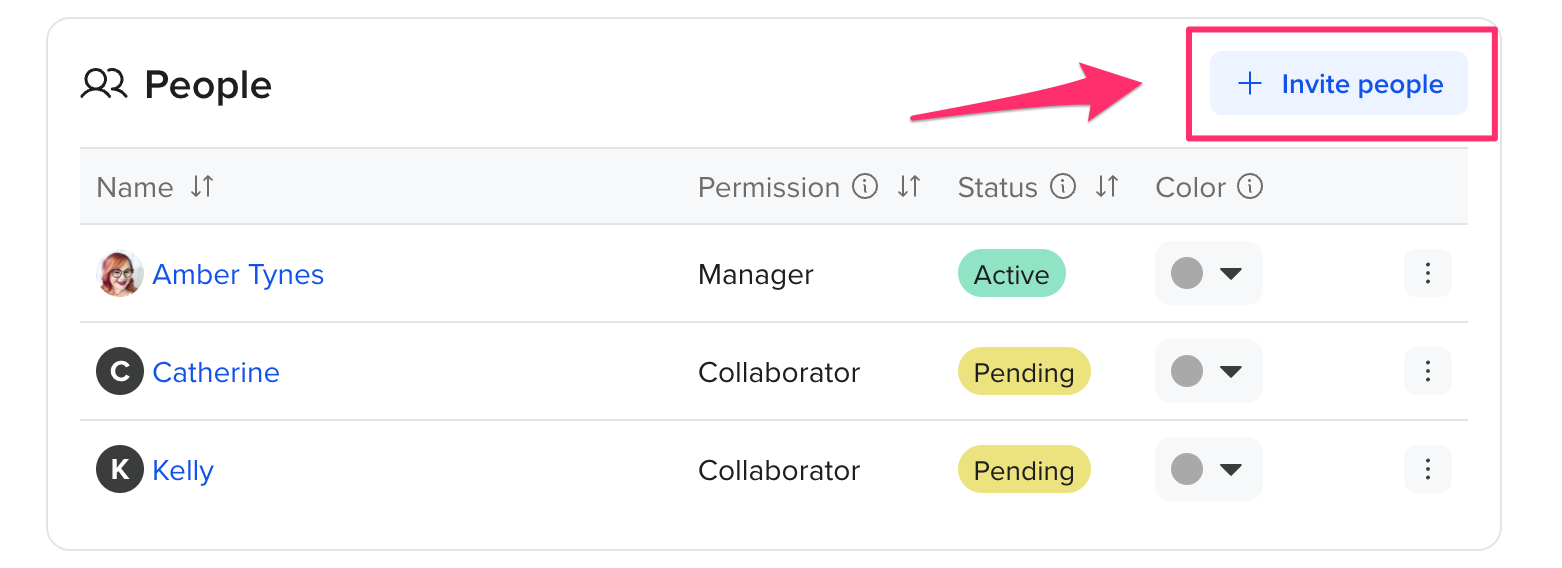
- Method 3: Click Share > Invite People button at the upper right corner of your project:

- Whichever method you choose, you’ll end up on your project’s
People page. From here, click the blue Invite people\ link, located just below the list of people who are already part of your project.
If the user already exists in your account:
Simply select the blue arrow next to the person you want to add to your project. This person will automatically receive an invitation to log into TeamGantt and access the project. Once you have selected everyone you wish to invite to the project, simply click "Close" in the bottom right of the window. 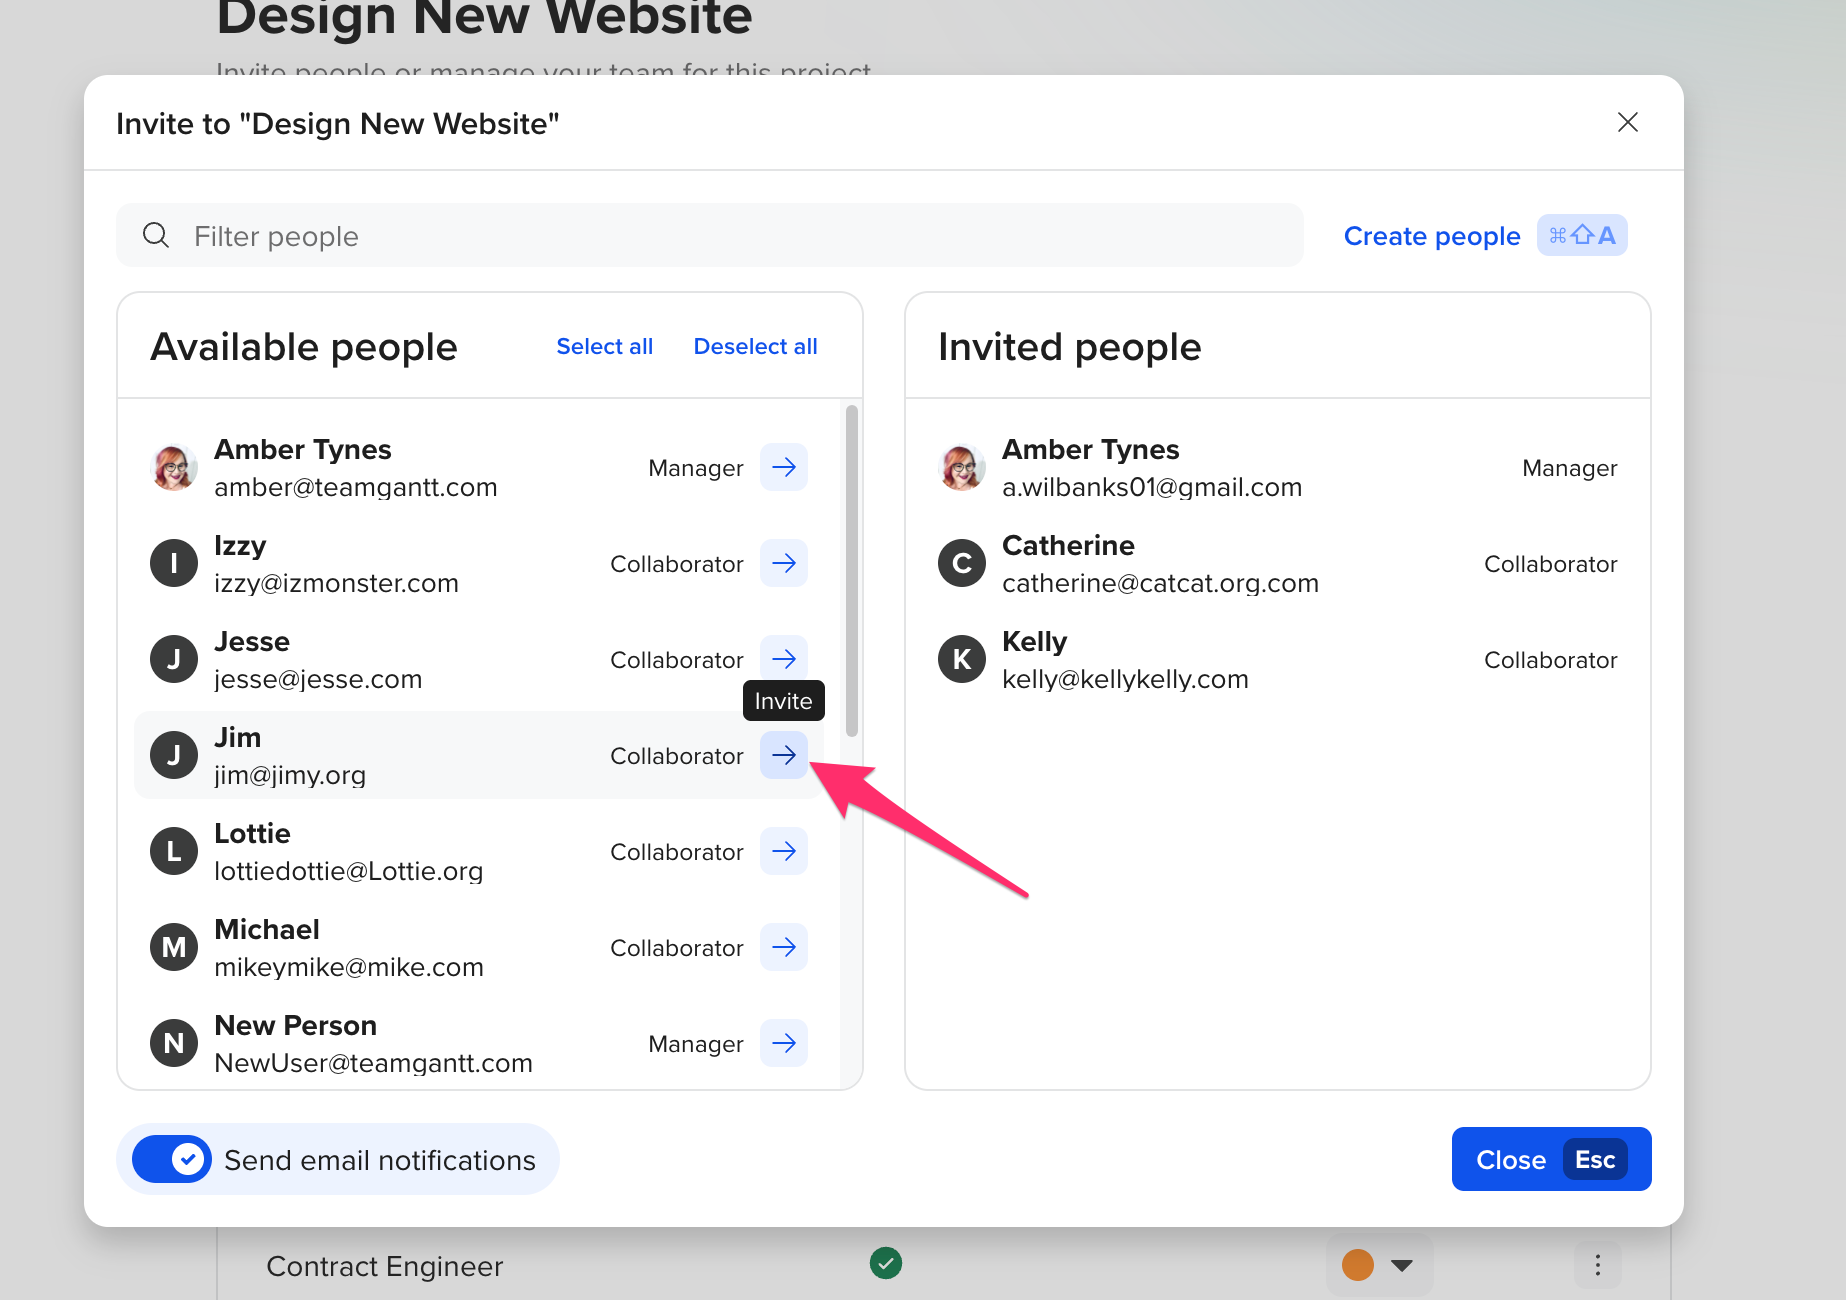
Note: You can also choose to "Select all" users on the account as well.
If the user does not exist in your account yet:
1. Click the "Create people" link.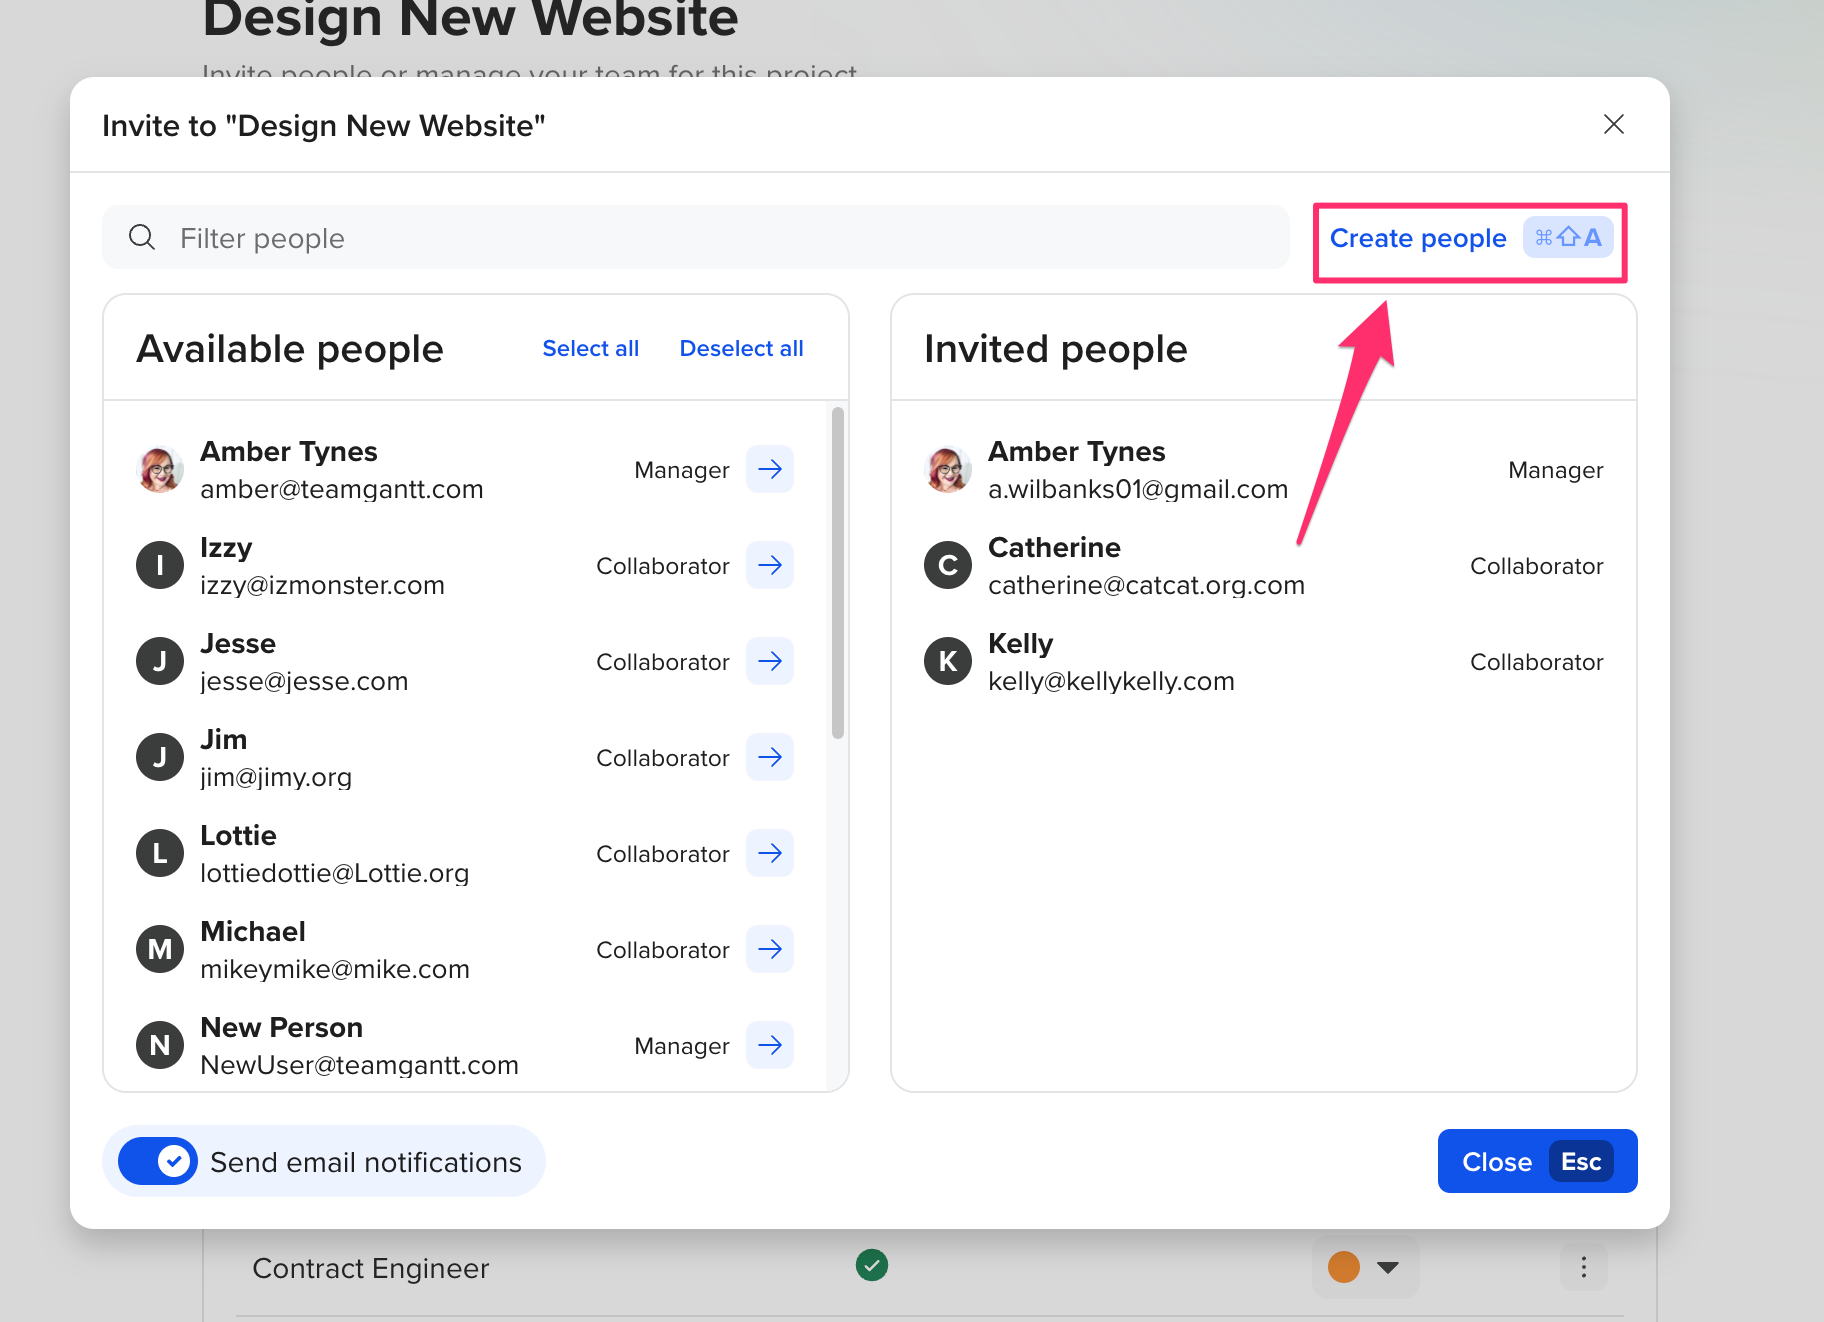 2. Next, enter the person’s name and email address, and select their Company Permission.
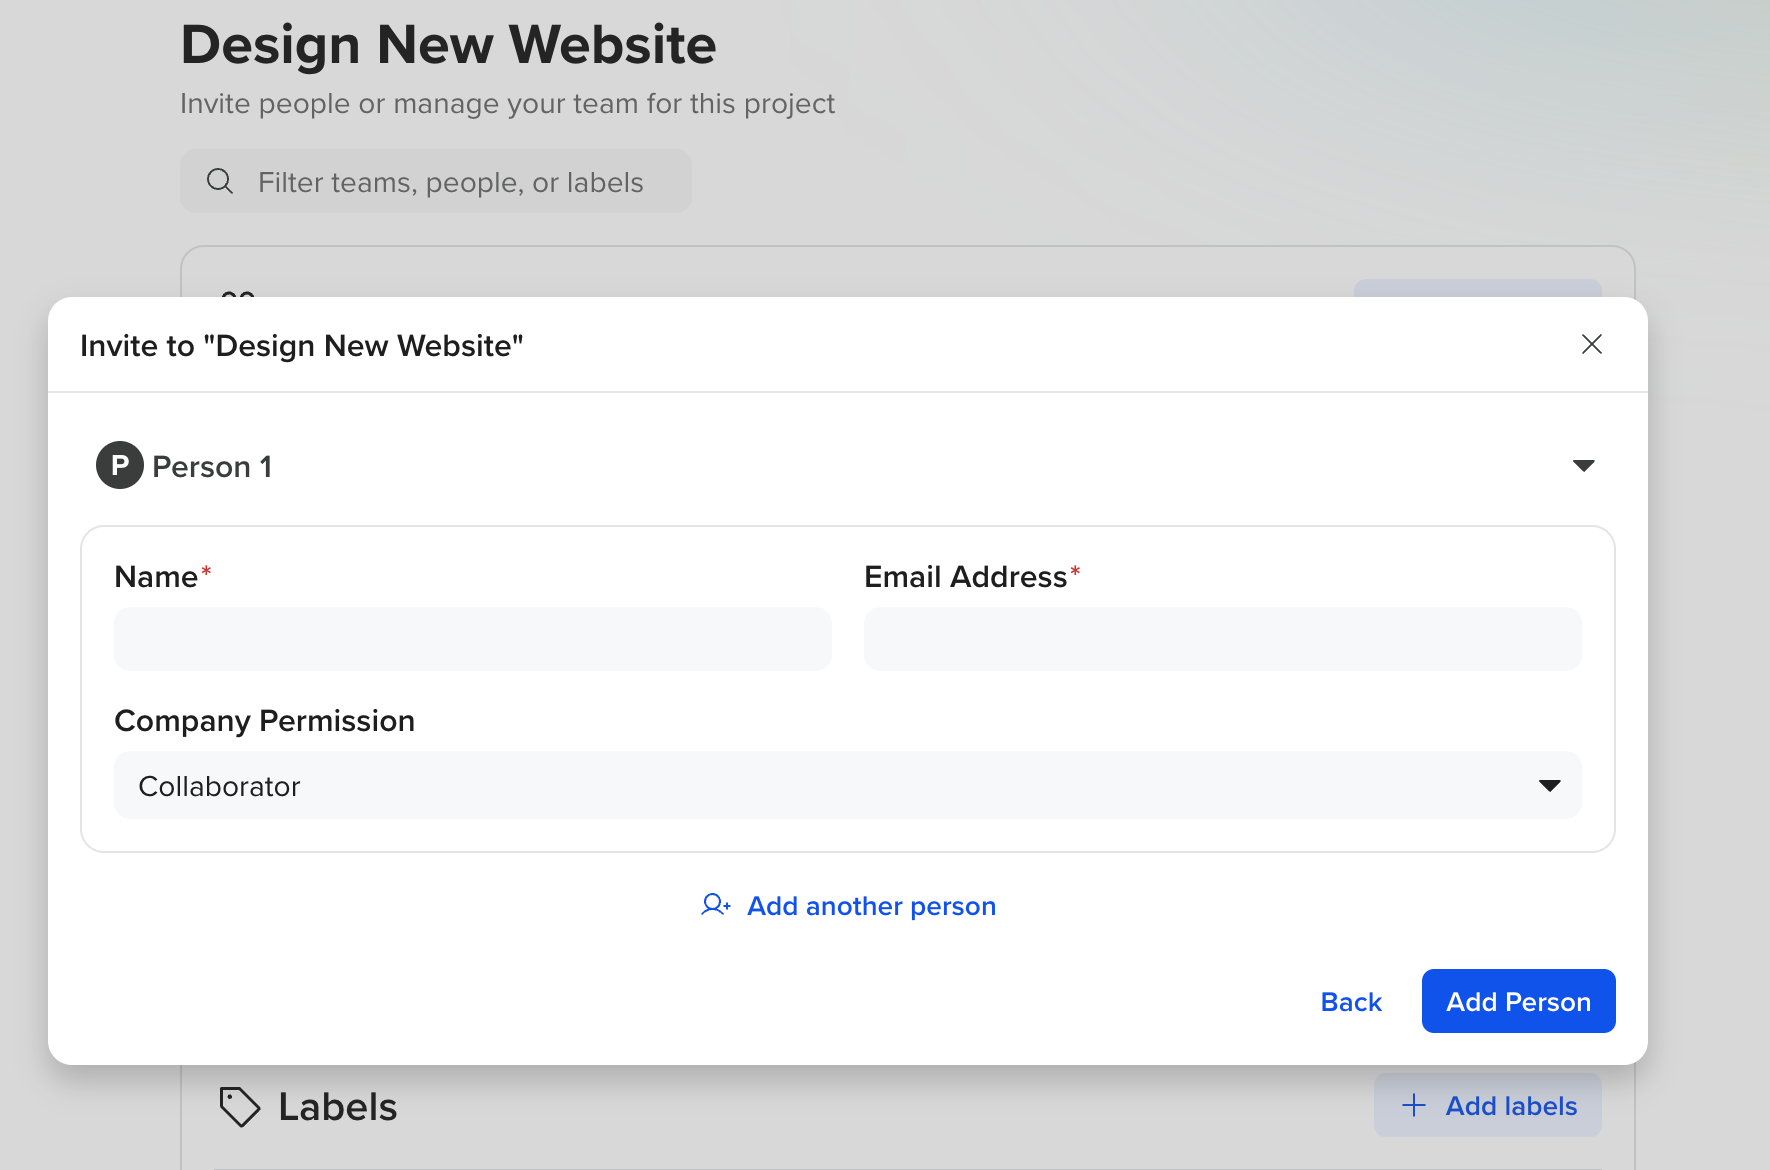
3. Click the Add Person button. If you need to add multiple people, you can select "Add another person" to add additional people.
4. Once you click on Add Person, this will add them to the account and project.
Project Permissions
TeamGantt enables you to control what users can access and edit at both the account and project level. You can learn how these permissions work on our Account and Project Permissions page.
Here’s a quick overview of the 2 permissions levels:
- Collaborator - Can be invited to projects, assigned tasks, update progress (%) on tasks, upload files and comment on tasks, and check off checklist items.
- Managers - Can modify the chart, invite and remove users, edit project settings, and delete the project.
Permissions are managed at the account level. As a manager with account admin status you can change global permissions on the Manage People page by clicking on the user's name.
Assign a single task to a user
Any user who has been added to your project can be assigned to tasks. Once you assign tasks to someone, you can easily identify who's responsible for each task.

You can assign tasks to people or other resources in two ways.
- Method 1: Click the person icon to the right of any taskbar to select a user or label to assign the task to. (Hover your mouse over that row to see the icon appear.)

- Method 2: From the Assigned column, click assign to select a user or label to assign the task to.

Both methods will display a drop-down menu that features the names of the people and labels available to work on that task. Choose the person or label you want to assign from the drop-down, or click Add new person/label. Then, click Done.
Tip: After assigning tasks to people, you can use the Everyone filter to see only the tasks that are assigned to a particular person or label.
Looking to get more granular with assignments? Check out our RACI feature!
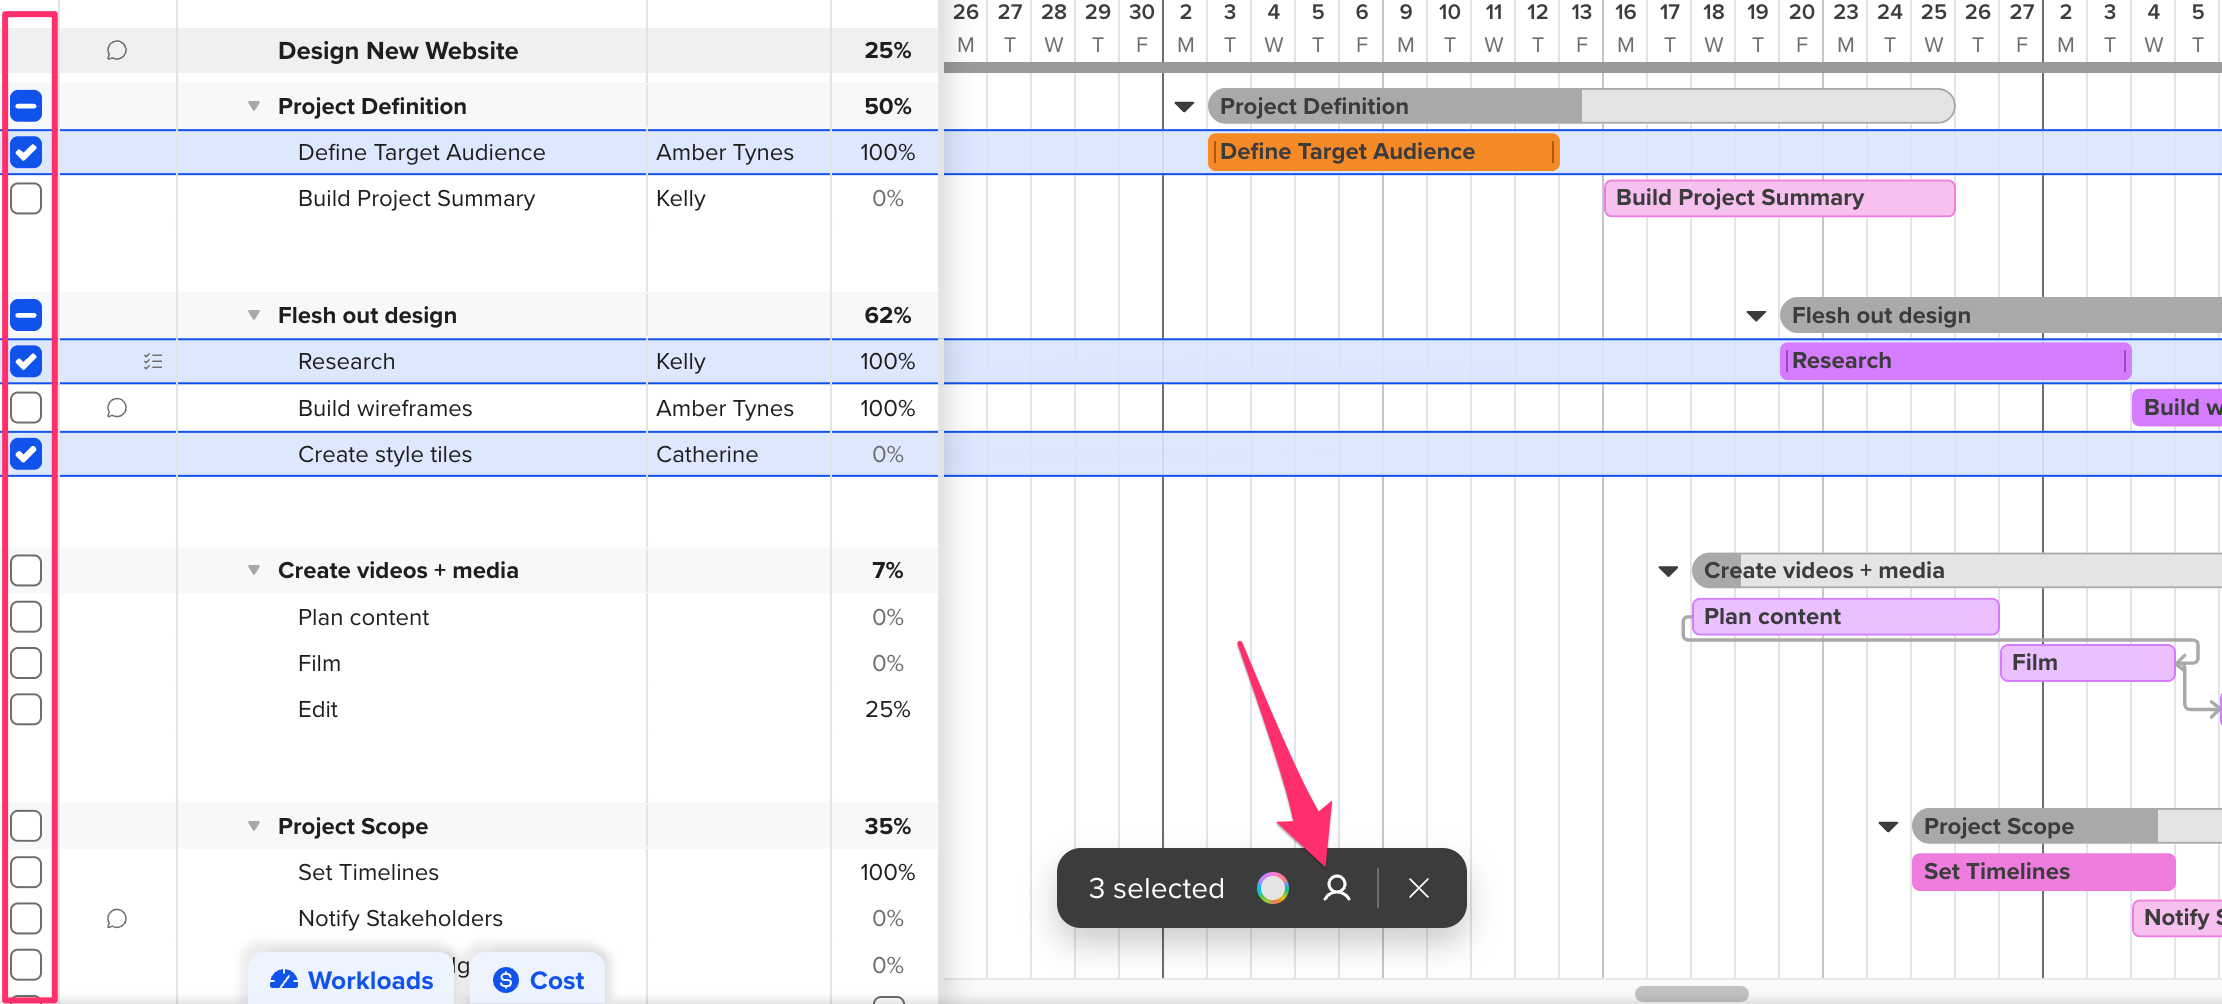
Assign multiple tasks to a user at once
When building out your project, you might need to assign multiple tasks to the same user or label. Here are three simple ways to divvy out multiple assignments at once:
Option 1:
- Check the checkboxes of the tasks you'd like to assign
- Click the person icon in the toolbar at the bottom of the screen.
- Choose the person and/or label you want to assign to the selected tasks.
Option 2:
- Click the taskbar for the first task you'd like to assign.
- Hold Command (Mac) or Ctrl (Windows), and click another task.
- Repeat step #2 until you've selected all the tasks/milestones you need to assign to the person or label.
- Click the person icon in the toolbar at the bottom of the screen.
- Choose the person and/or label you want to assign to the selected tasks.
Option 3:
- Click the taskbar for the first task you'd like to assign.
- Hold Shift, and click another task. This will select the 2 tasks you clicked and any tasks in between.
- Click the person icon in the toolbar at the bottom of the screen.
- Choose the person and/or label you want to assign to the selected tasks.
For more information about setting project-level permissions, check out our Permissions tutorial.
Looking to get more granular with assignments? Check out our RACI feature!
To learn more about TeamGantt, join us for one of our webinars!