Do some of your tasks involve multiple steps or simply need more detail? Good news! TeamGantt's checklist feature makes it easy to give your team clear direction on any task. Here's how it works.
How do I add a checklist to a task?
TeamGantt gives you 2 different options for adding checklists to a task.
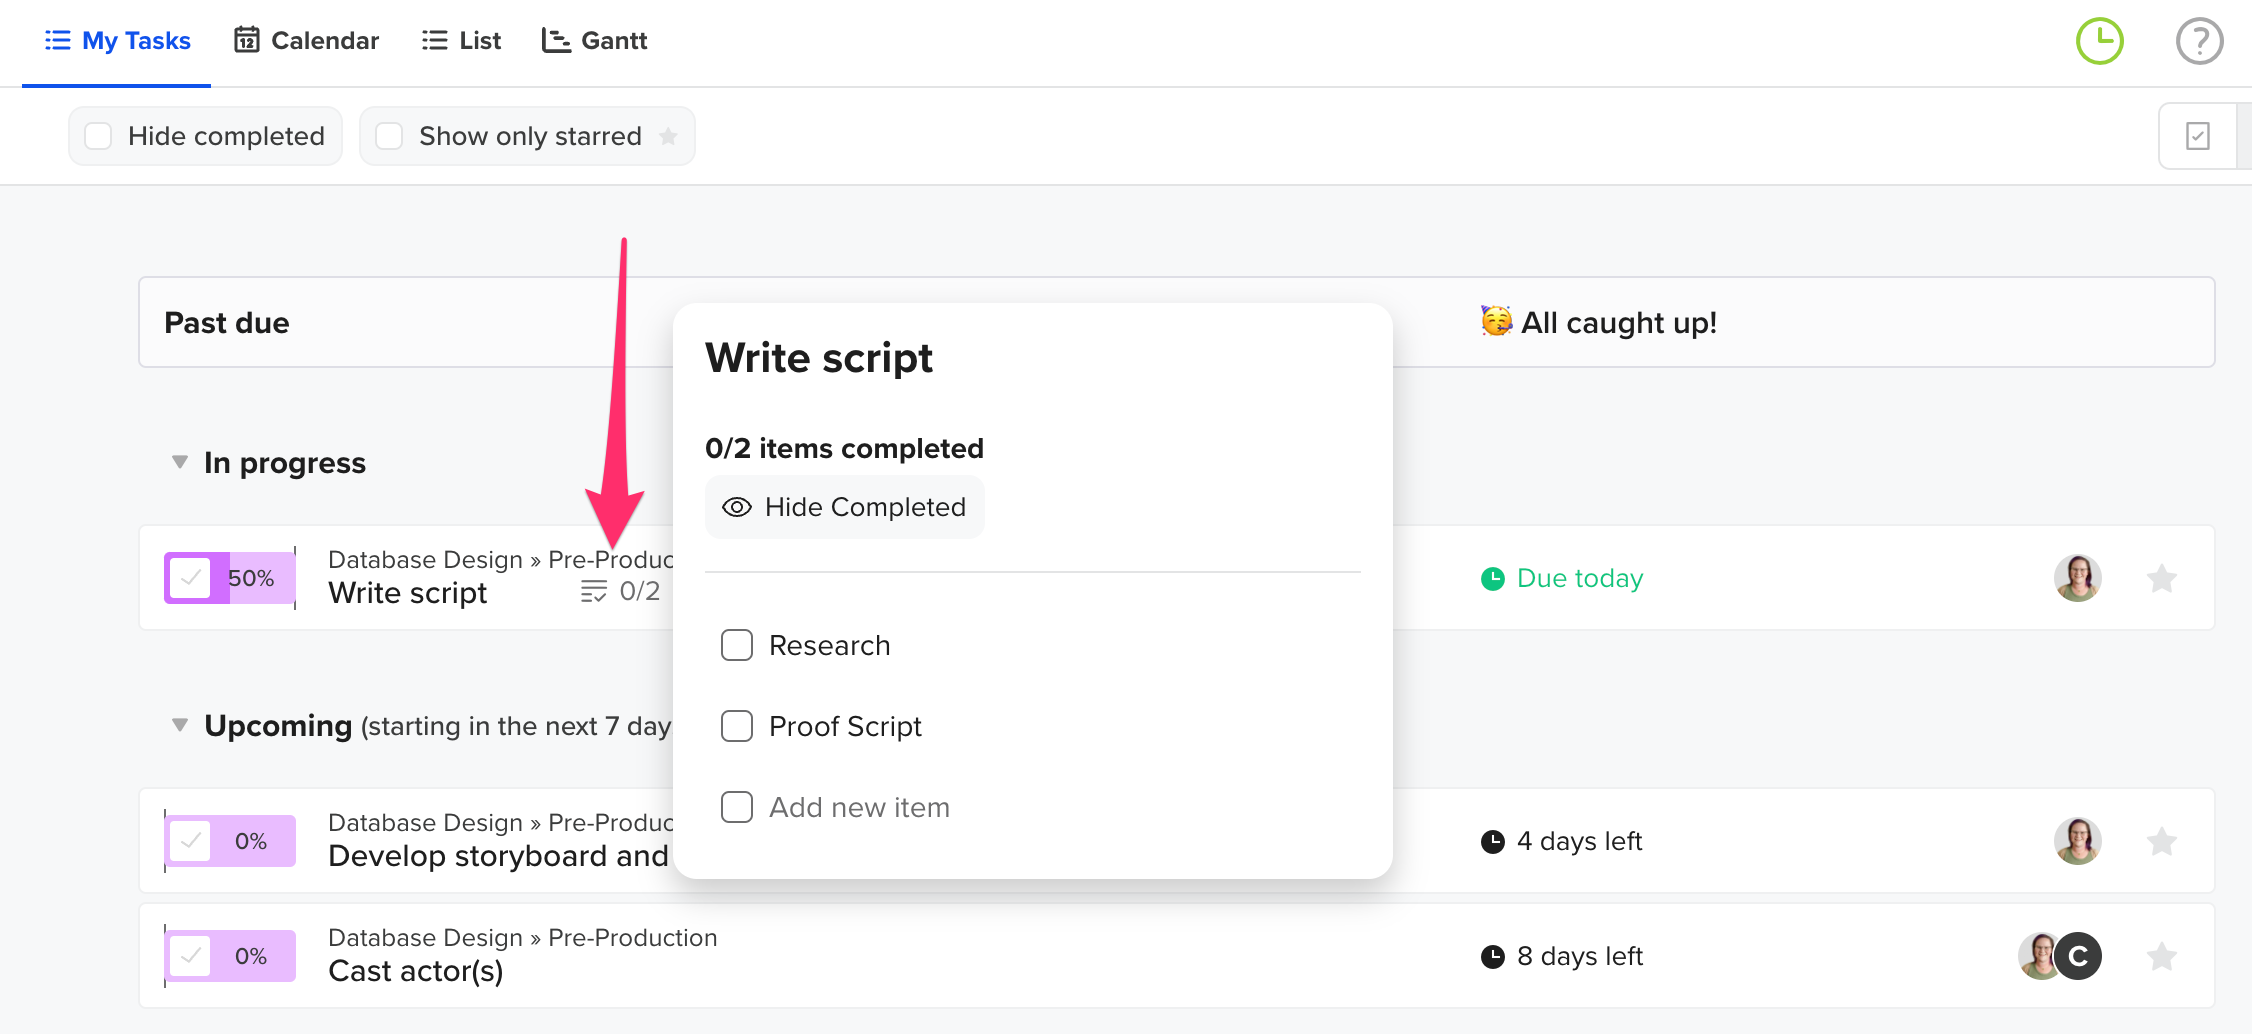
Option 1: From your My Tasks tab:
- Hover over a task, and click the checklist icon that appears under the task name to open the checklist window.
- Add your checklist item, and hit Enter on your keyboard. The checklist item you just added will automatically save, and a new checklist item will appear under it.
- As each checklist item gets knocked out, simply check the box the left of the item to mark it as complete.

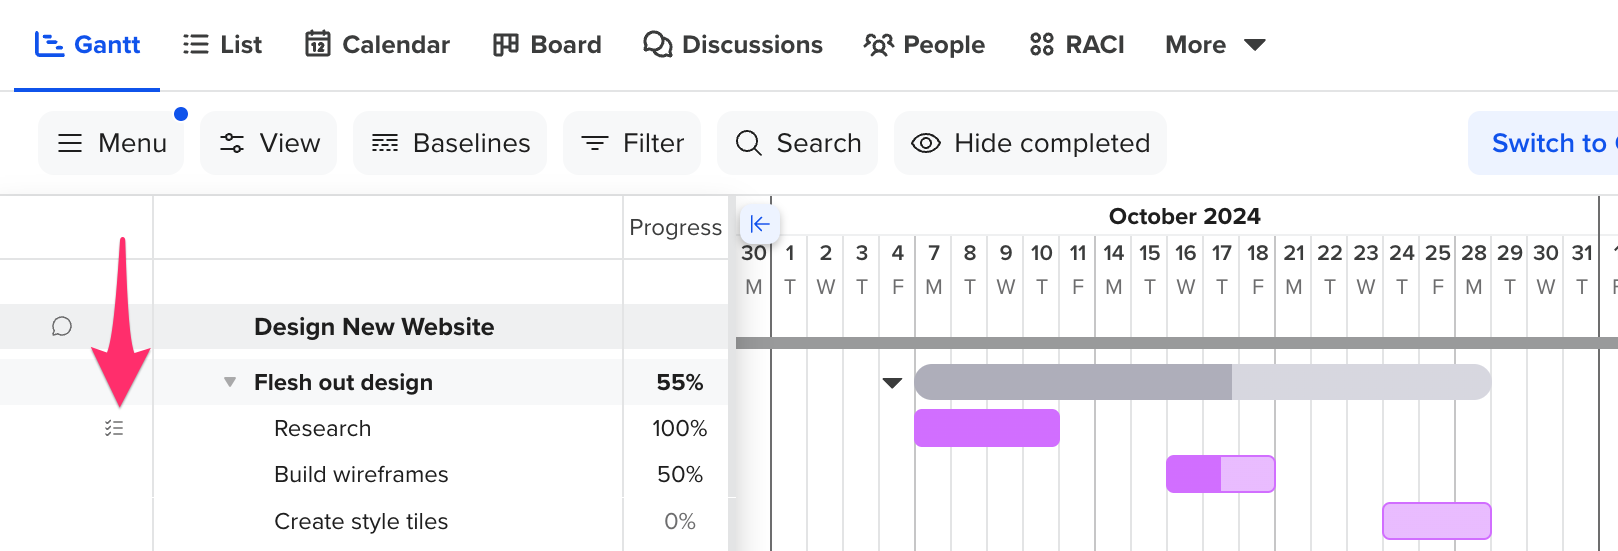
Option 2: From the gantt chart view:
- Hover over a task, and click on the checklist icon that appears to the right of the task name.
- Add your checklist item, and hit Enter on your keyboard. The checklist item you just added will automatically save, and a new checklist item will appear under it.
- As each checklist item gets knocked out, simply check the box the left of the item to mark it as complete.

Note: Any user in the project will have View access to your checklist.
How do I duplicate a task checklist?
Checklists can be duplicated by duplicating a task or task group that has a checklist associated with it.
Additionally, you can duplicate checklists when you duplicate a project or create a new project from a template. Click here for more info on duplicating projects.
Do you need a higher level of detail? Check out our to-do list option using markdown!
To learn more about TeamGantt, join us for one of our classes!