How do I sync a Jira project with TeamGantt?
You can use Zapier to connect your Jira and TeamGantt projects. Follow the steps below to automatically create or update tasks in TeamGantt whenever an issue is created or updated in Jira.
1) Create a new project in TeamGantt
- Load TeamGantt
- Log in or sign up
- Create a new project
2) Create a custom field in Jira
- Load your Jira site
- Load the custom fields admin page: "https://<your-site-name>.atlassian.net/secure/admin/ViewCustomFields.jspa" (you will need to replace "<your-site-name>" with the name of your Jira site)
- Click "Create custom field"
- Specify "Short text"
- Name the field "tg_id" (see GIF below)

3) Add the new custom field to all of your Issue types
- Navigate back to your project
- From the sidebar, click "Project settings"
- Click "Issue types"
- Select the "Task" issue type
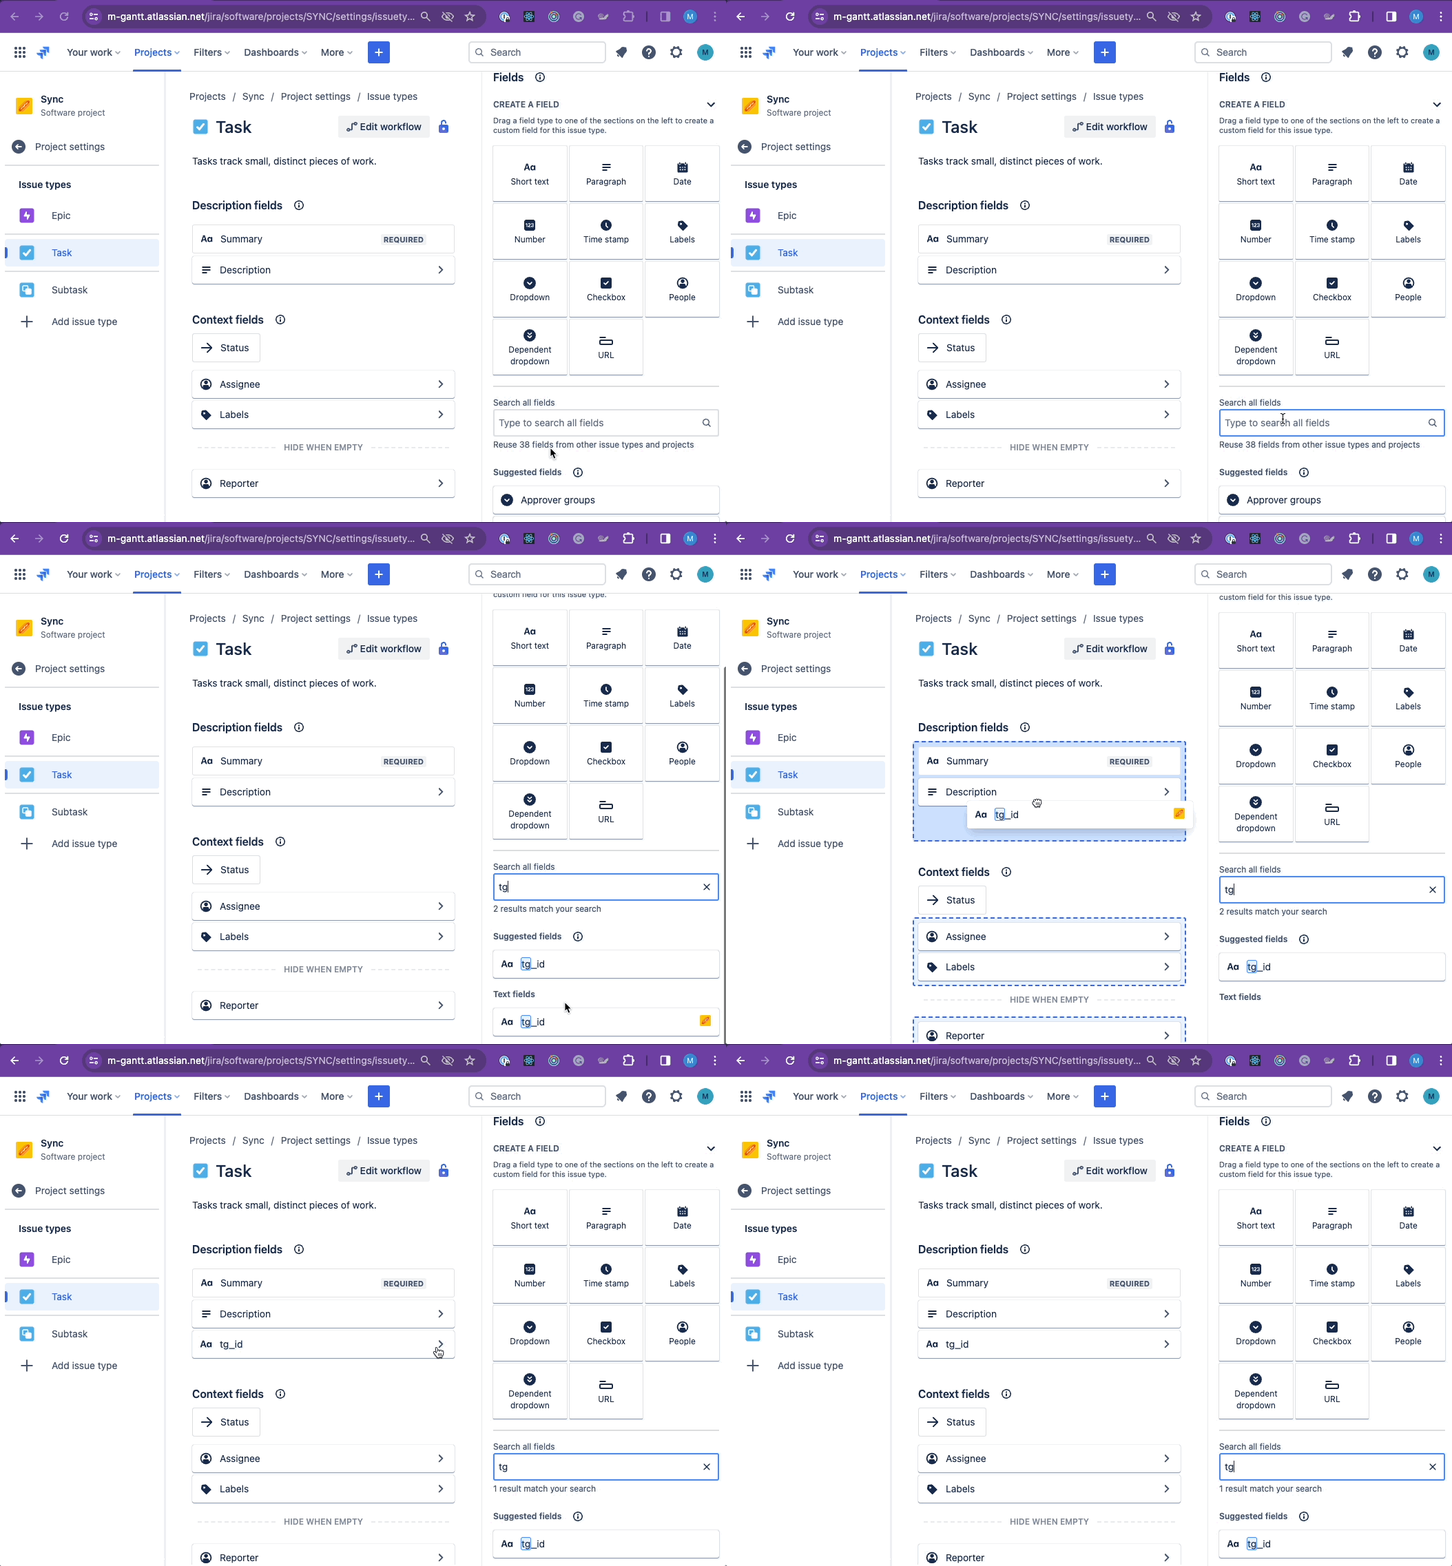
- Drag the "tg_id" field into the "Description" or "Context" section (see video)
- Repeat for all other Issue types (i.e. Epic, Bug, etc). If you don't add this field to all of your issue types, it could cause Zapier errors.

4) Save the ID number of the new custom field
- Navigate back to the custom fields admin page: `https://<your-site-name>.atlassian.net/secure/admin/ViewCustomFields.jspa`
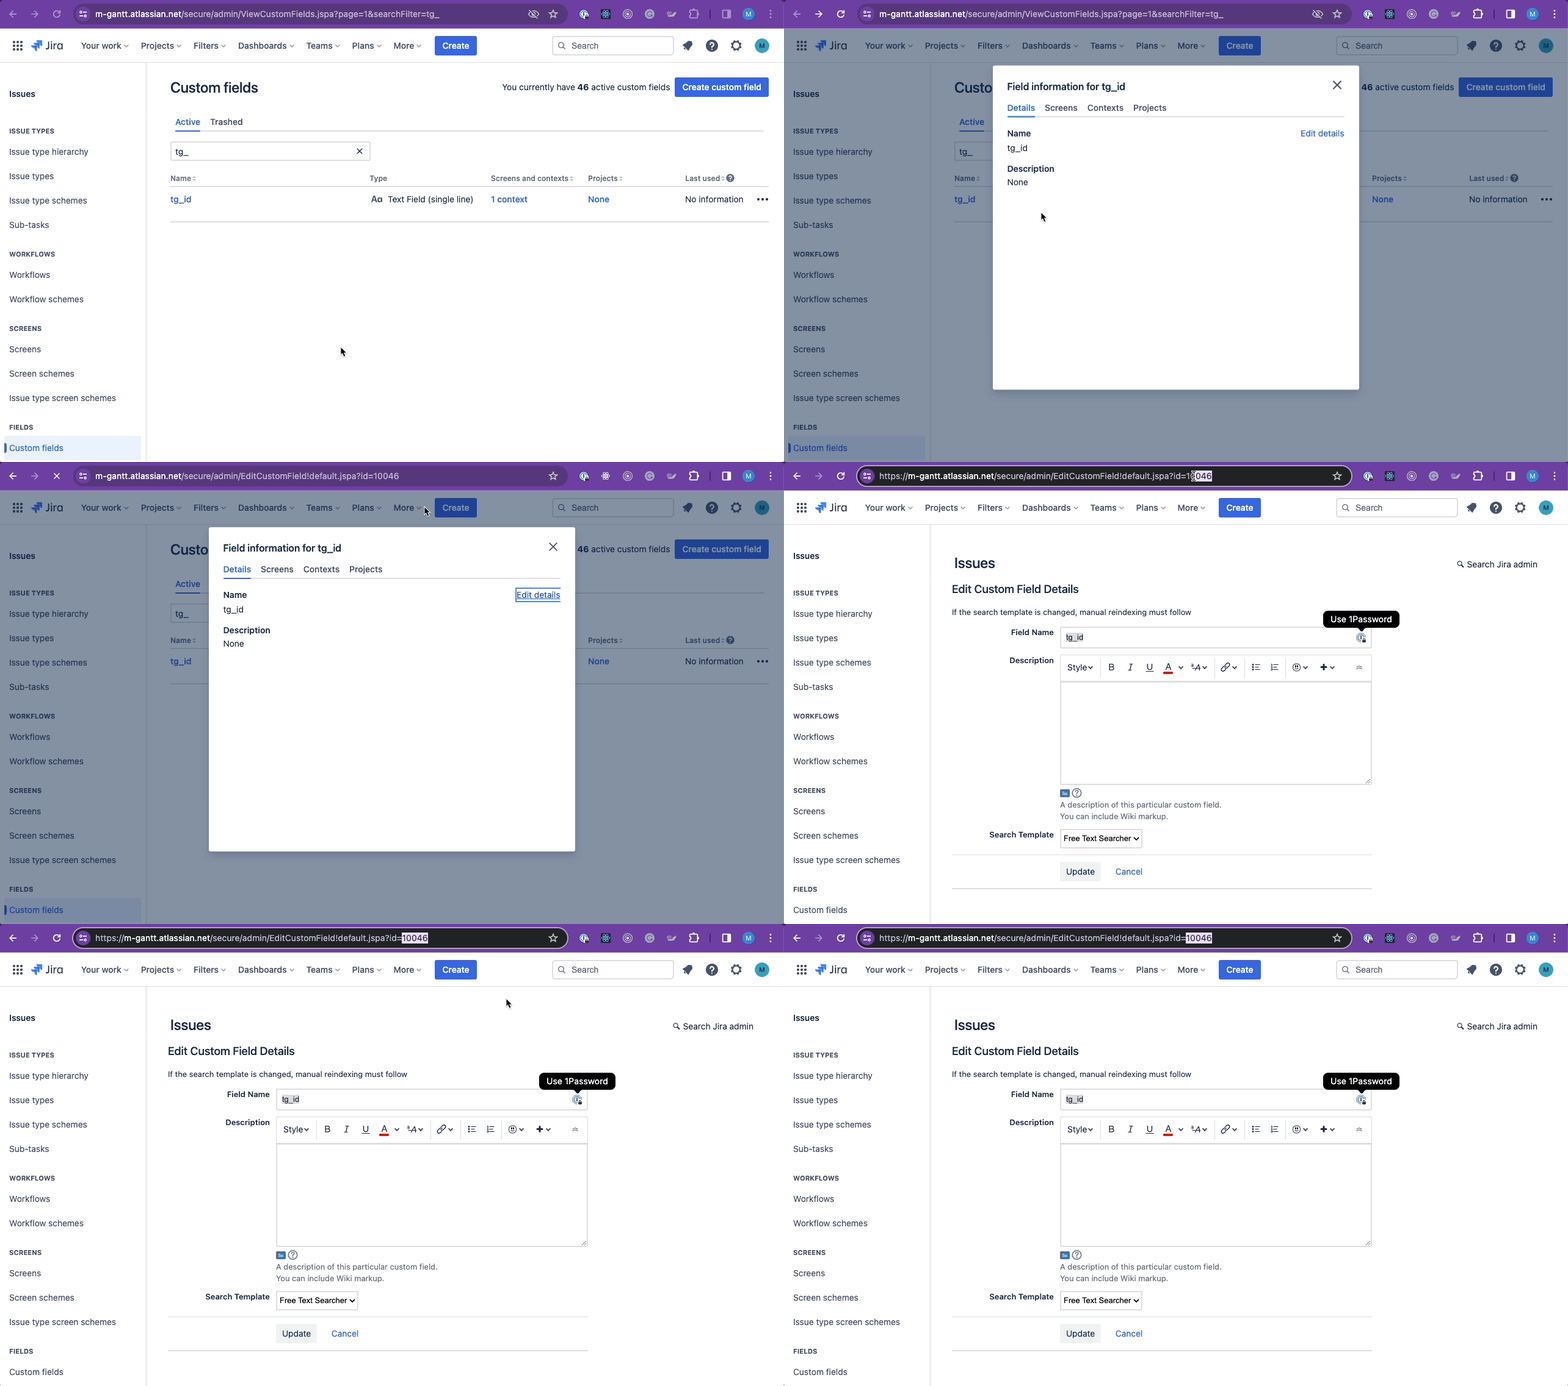
- Locate the "tg_id" field and click on its name
- Next, click "Edit details"
- Save the id field that is appended to the end of the URL in your browser window (see video)
You will need this ID to set up Zapier!

5) Create a Zap to keep TeamGantt in sync with new Jira issues
- Open Zapier (contact matt@teamgantt.com to request access to a Zapier template that will help get you started on this Zap)
- Click "Create Zap"
- Add a New Issue trigger from the Jira Software Cloud app
- Add a Create Task action from the TeamGantt app (specify whatever fields are needed. Select the project that you created above)
- Add an Update Issue action from the Jira Sofware Cloud app. In the "Issue" field, be sure to specify the key of the issue included in the trigger from Jira. Also, be sure to populate the "tg_id" field with the id of the task that was created in TeamGantt's Create Task action

6) Create another Zap to keep TeamGantt in sync with updated Jira issues
- Open Zapier (check out this Zapier template I created to get you started on this Zap)
- Click "Create Zap"
- Add an Updated Issue trigger from the Jira Software Cloud app
- Add an Update Task action from the TeamGantt app. For the "Task id" field, use the value associated with the "tg_id" custom field. The Jira app doesn't expose "tg_id" by name, but instead by its custom field id. Remember! You saved this in a previous step. Find it and select it (see below)

Troubleshoot issues
- I would recommend only creating a custom field from the custom fields screen in the account's admin settings section of your Jira site (I included the link to that above). I've noticed that if you create a custom field directly from the project's settings page, it's only available to the project you created it on (which isn't much of a problem unless you want to sync multiple Jira projects to one TeamGantt project). The real issue is that it's really hard to find the ID number for that custom field. I had to watch network batch requests to find it... oof.
- The "Test" step in Zapier is a challenge! If the test is failing. Make sure that the issue being pulled in from Jira in the trigger step is up to date.
- All of your Issue types must sync to TeamGantt in order to avoid errors being Triggered in Zapier. It would be helpful if Jira's Zapier app allowed users to exclude epics or other issue types. Unfortunately, this is not possible.
Take this further
- You might want to create a bi-directional sync so that updates in TeamGantt are reflected in Jira. You could accomplish that by creating additional zaps to handle task creation and updates in TeamGantt.
- You might want to sync multiple Jira projects to a single TeamGantt project. This could be possible with additional Zaps.
- You might have existing Issues in a Jira project that you want to sync to TeamGantt. This might require some manual entry, but it is possible. Reach out to our support team for ideas on how to accomplish this.